Configuring your Azure AD/Entra ID SAML account for SAML authentication
Last updated: June 12, 2026
Follow these steps to configure your Azure AD/Entra ID to authenticate using SAML with your identity provider. You can create different configurations for both our Production environment and Play environment.
Prerequisites
A Microsoft Entra subscription.
Microsoft Entra SAML Toolkit single sign-on (SSO) enabled subscription.
Either be a Cloud Application Administrator or an Application Administrator
Step 1: Create a Custom SAML App
Sign in to the Microsoft Admin Center Sign in to the Microsoft Entra admin center as at least a Cloud Application Administrator.
Select Identity > Enterprise Apps
Click New application in the Enterprise Application screen
Enter a name for your app (e.g., FactorSSO)
Select the "Integrate any other application you don’t find in the gallery (Non-gallery)" radio option
Click create
Step 2: Configure the application
In your new app, go to Single sign on and select the SAML method
Under Basic SAML Configuration, enter the following details:
Reply URL (Assertion Consumer Service URL) for production:
https://idp.usefactor.io/saml2/idpresponseReply URL (Assertion Consumer Service URL) for play:
https://idp.play.usefactor.io/saml2/idpresponseIdentifier (Entity ID) if configuring for the production environment :
urn:amazon:cognito:sp:ap-southeast-2_FXF31XNiaIdentifier (Entity ID) if configuring for play environment :
urn:amazon:cognito:sp:ap-southeast-2_be7W0jatC
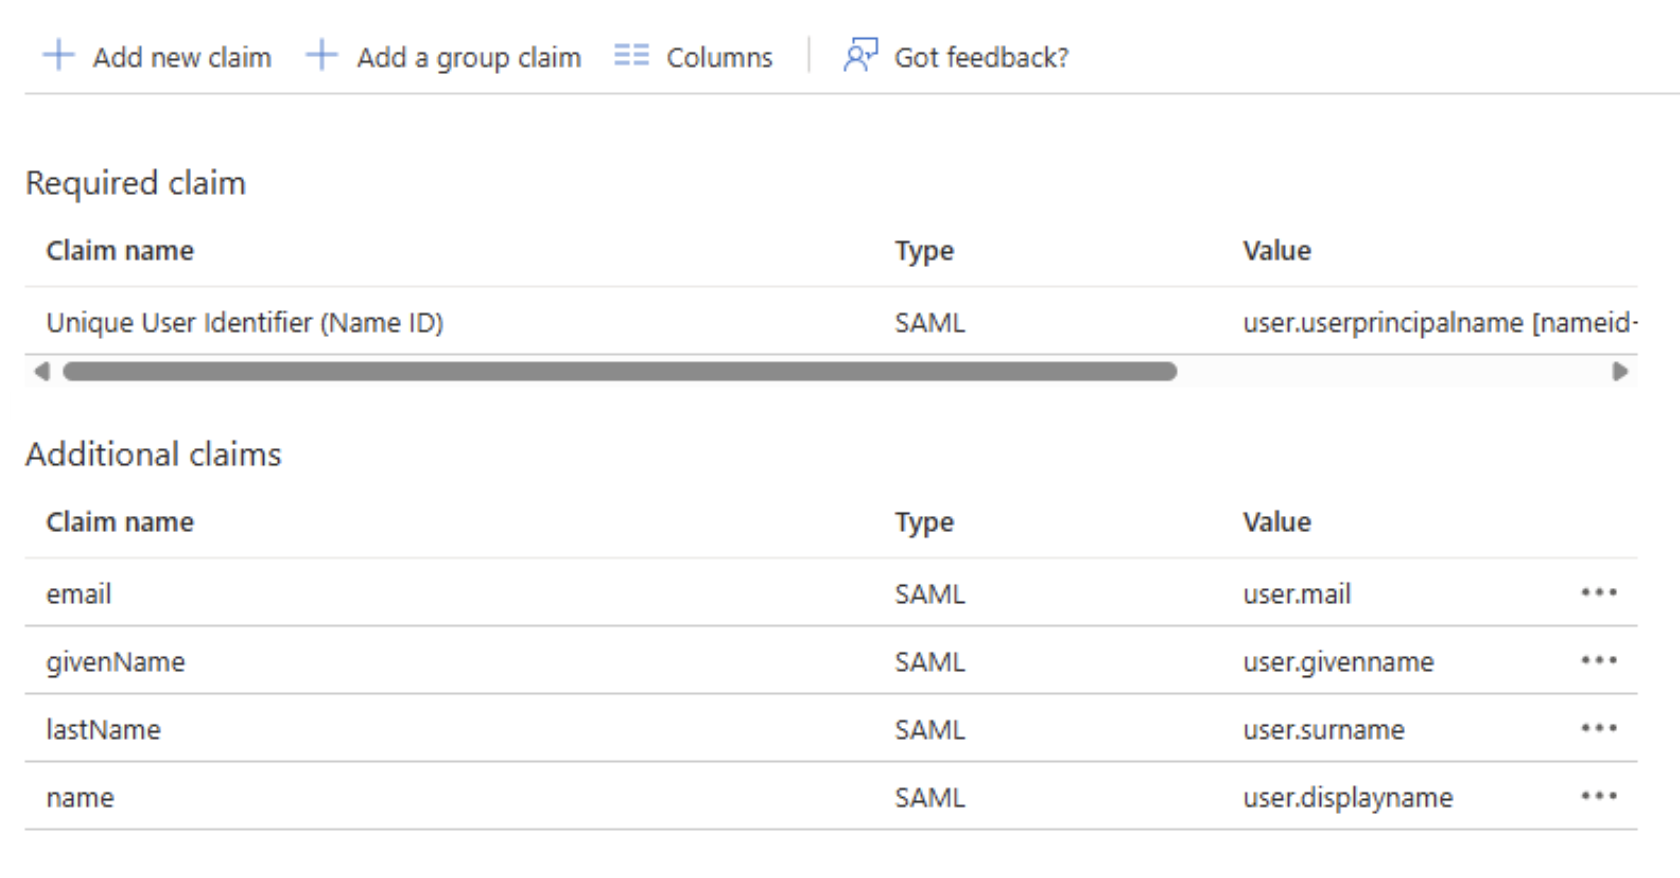
Scroll down to Attributes & Claims and configure the following claims (delete any pre-filled namespace values)
Claim name | TYPE | Value |
SAML | user:email | |
givenName | SAML | user:givenName |
lastName | SAML | user:lastName |
name | SAML | user:displayName |
When completed, it should look like this:
Step 3: Add users
Click on Users and groups on the LHS menu
Select + Add user/group
Select the users and or groups to access Factor
Step 4: Download your Meta data configuration
Scroll down and click Download the Federation Metadata XML
Securely send this file to Factor support for setup
Your Azure AD/Entra ID account is now configured for SAML authentication with Factor. Before you can access your Factor instance, you'll need to provide the IDP metadata file to Factor. We'll then configure your instance ASAP to get you started.